It’s a small blog where I want to share my daily routine before I take my car for the ride. So let’s begin with a walk around the car.
Walk around the car, check for flat tires, and bend under the engine for any leakages.
Engine – First put the key and turn the key to ACC mode and wait there for 15-30 seconds before starting the engine (So that the oil pump will get ready). Just make sure not to rev your engine once it starts. Technically speaking keep your leg away from the throttle and let ECU take control of vehicle RPM (It may be around 1500 RPM). Just apply the handbrake & switch on the headlamps and come out of the vehicle.
The next thing I do is clean the windshield and window glass using a microfiber cloth and keep an eye out for any blown-up bulbs for the headlamps and brake light.
Once done, come back inside the cabin and most probably engine RPM come down below 1000 RPM.
An important thing to notice – There should not be any CHECK ENGINE LIGHT on the MID screen after starting the engine.
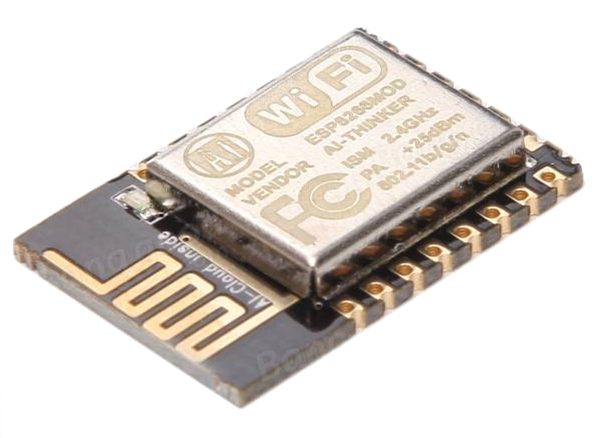
The NodeMCU (Node MicroController Unit) is an open-source software and hardware development environment built around an inexpensive System-on-a-Chip (SoC) called the ESP8266. The ESP8266, designed and manufactured by Espressif Systems, contains the crucial elements of a computer: CPU, RAM, networking (WiFi), voltage regulator, and even a modern operating system and SDK. That makes it an excellent choice for Internet of Things (IoT) projects.
It provides a lot of convenience for developers to focus on building new things. But once you are done with your prototype project then you need to wrap the circuit and make it compact. Here you can use ESP 12 which provides all functionality but with minimum hardware and a very compact design. But you can’t use these chips directly into your circuit as these are not breadboard or circuit-friendly because of their pin gap.
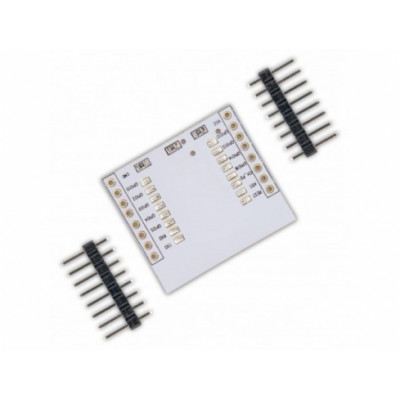
So you need an adaptor circuit that has a standard pin setup and also has required resisters which help in programming these circuits and also a place for installing the 3.3 voltage regulator.
So first you need to solder the ESP 12 pins into the adaptor circuit. Soldering might be a little challenging as it requires little practice. The basic ESP 12 pinout is given in the picture.
11 GPIO (General Purpose Input Output) pins available with ESP 12.
The below image contains its respective pins mapping table.
To run our automobile smoothly year after year, we need to keep the car health top-notch. Just like how we care about our kids (in most cases), our bikes and cars are also our kids.
We usually get our vehicles serviced once a year (in most cases) but we can do a few checks every month to avoid a few breakdowns that occur because of workshop labor ignorance or their mistakes or wear and tear issues.
Every 1st Sunday of the month, I used to do the below checks for my vehicles. Checks are based on priority.
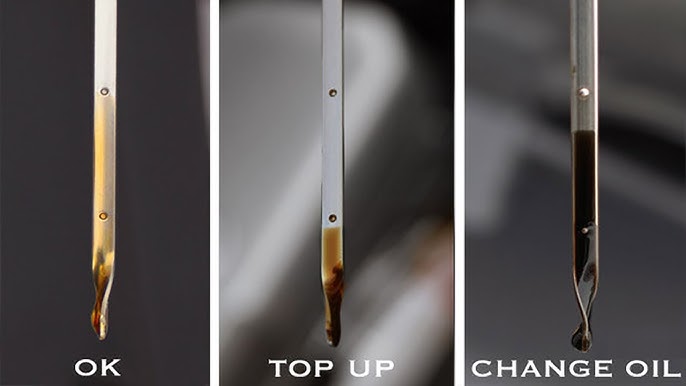
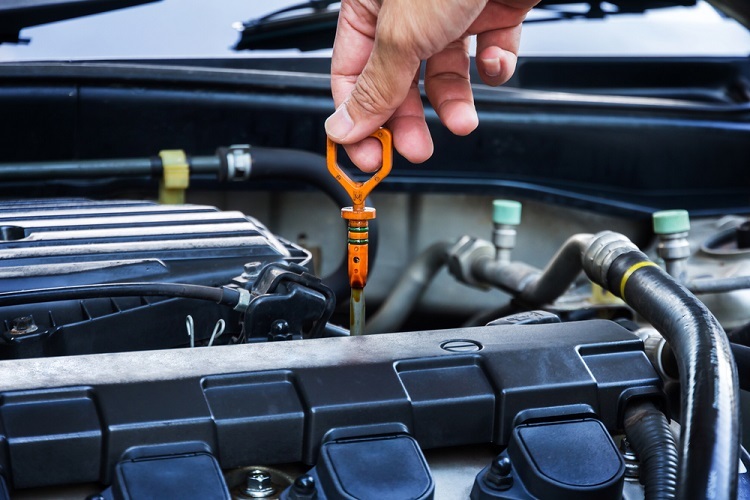
Engine oil – Engine oil is just like blood running over our body. Quality and quantity matter for long engine life. So we need to check the engine oil level every month and if required, please top up or take the vehicle to the service station for top up. But I encourage you to do it yourself (DIY), as it gives you a different exposure to understand your vehicle.
Your car engine must contain a dipstick (which is used for checking the engine oil level). So your first job is to locate the dipstick position by referring to your car manual. There are different types of dipstick designs but most consist of two dots (the bottom dot indicates LOW and the top one indicates FULL). So ideally, the engine oil level should be near the FULL mark, if not then only a top-up is required.
Coolant level – Coolant is the second most important check for any vehicle. Because of constant engine heating, it evaporates normally which leads to coolant consumption. So it’s important to keep an eye on the coolant level every month. Check the coolant reservoir for FULL and LOW marks. As the automobile company places these reservoirs in a different location kindly follow your “Car manual” for location. You need to keep the coolant level near FULL and top up with distilled water if required.
But suppose every month, if the reservoir requires top-up that means there is a leakage or some other issue with the cooling system. Please get a thorough check from the Car service center immediately. A few Important notes – Please top up only in the reservoir tank, not the main radiator, and for a top-up use premix (distilled water and recommended coolant – green, orange, or pink color coolant) or only distilled water as a top-up liquid.
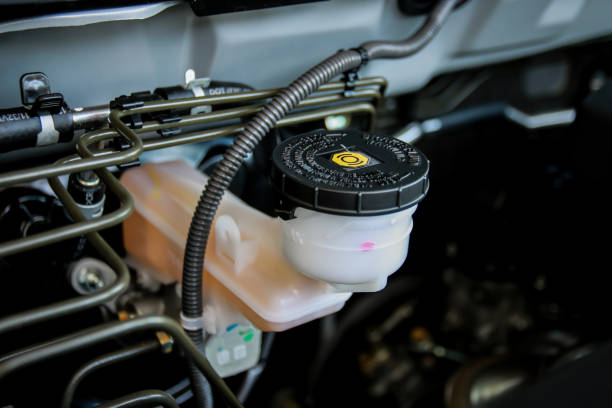
Brake fluid – This is the third most liquid to check in your car. In an ideal condition, its level remains the same but if it goes down then most probably your brake shoes are gone, and it’s time to replace or some other issue in the brake line (leakage, brake drum, or something else).
Brake fluid reservoir
So suppose your brake shoes are new and then the brake level goes down, it is a clear indication that there is some major issue with the braking system. So get your car inspection done by a service center professional.
Battery Check – Your car battery is the lifeline for all electrical operations and trust me nowadays in modern cars if the battery goes down for any reason then it will bring your car down completely. And the battery also requires little maintenance.
Once you start your car, the alternator keeps charging your car. But during nighttime driving, car headlamps consume current directly from the battery by discharging them. So this cycle keeps going .. charging and discharging. This results in increasing the temperature inside the car battery which results in lead acid evaporation. So it’s important to check whether your car battery requires distill water top-up.
There is an indicator on top of the battery panel, which indicates any battery top-up or charging.
Ok (Green in color) – everything is alright
Red – Top-up required
Grey/ white- Battery replacement time arrived (color depends on brand to brand)
Rubber hose and fan/drive/serpentine belt – This is another very important checklist item that leads to engine seizure. There are a few hoses that carry the coolant from the engine to the radiator for cooling and then take it back to the engine. This is very important in maintaining engine operating temperature.
Just imagine, that any leakage in these rubber tubes causes a catastrophe in the engine cooling system, and that ultimately leads to engine failure because of overheating and also causes engine seizure in case of negligence.
Do a proper inspection of rubber tubes and belts by doing a visual check and then pressing it with your finger and then looking for any cracks or wear and tears.
Air conditioning/ Heater – During winter months, no one uses the air conditioning, and result, all major components such as the compressor, condenser, evaporator, etc lead to corrosion and other sorts of damage. So easy fix for this is to run the car AC systems at least once in a month for 10 to 15 minutes and you can avoid surprises during summer. And the same is true for car heaters, so use this during summer also.
That’s all we have from the monthly checklist, if you take care of these points then 99% time, your car will run healthy.
After finalizing the location and builder for your dream project, the most important thing matter is to select the right flat. It looks simple but becomes a big pain in the long run if you selected the wrong flat there which ultimately ends up in selling that property. So I compiled a shortlisting criteria based on my experience which will help you.
Floor to select – On which floor shall I buy a flat? Ground floor, first floor … Few things matter when you select a flat in any society. These are the points that I made to make things easy.
> Always try to avoid buying on the ground floor flats until you have claustrophobia. There are lot of sound pollution in the ground floor flats because of vehicle movement, and kids playing in parking areas.
> Also as every society has gardens and few trees as well. So it will obstruct natural lights on the ground floor and also these gardens attract a lot of insects so you can’t enjoy your window properly.
> Same time, top floors have common issues such as heating & water seepage. Trust me heating is the biggest problem and it makes life very difficult during summer even though you have air conditioning in rooms. If water seepage starts, it will destroy all wall paints and lead to fungus development, ultimately a health risk.
Suppose the project is Ground + 4 floors so picking the flats from the second and third will make living more enjoyable.
Power Genset– All big societies nowadays have big power generators to provide constant power backup. So whenever these big generators run, they make some sound (not loud but constant buzzing sound). And also creates constant vibration which definitely creates some damage to the building structure in the long run.
So study the project plan carefully and figure out the location for the power generators in society. So don’t select the flat near to the power generator in any case as it will affect your daily life.
Garbage collection spot and STP – Again every society, has a dedicated area for daily garbage collection, and trust me, however, they keep it clean but still, it’s a big source of daily hygiene issues, like rat & fly issues. Generally, they keep garbage near the STP (sewage treatment plant) area.
So if society doesn’t have a clear plan/ or has not decided yet on a location for STP or garbage collection point then my suggestion is to stay away from those societies. Consider only when it has a very big open area so they will create space in the vicinity.
Play area and clubhouse – Trust me kids are wonderful but the play area is total nonsense. It’s a constant source of constant noise for 24 x 7 x 365 days. It will make your life hell, don’t take this in the wrong way but this is a real menace. So try avoiding flats just next to the play area, clubhouse, or swinging pools.
Actually, poolside flats cost more but I really don’t want to see people making nonsense in front of me and my family when we just thought of enjoying our evening tea.
Flats near staircase or lift – There are a lot of movements used to happen near the lift/ staircase such as delivery guy, courier person, maid, etc. So if you want to keep the main door open for a while also then chances are that you will see few people moving up/down. So I would suggest that avoid selecting the flat-facing staircase/ lift.
Interior modification – If it’s an under-construction property then you can modify a few things like window location, wider windows, door location, open kitchen, balcony modification, water tape in the balcony, additional basin, redesigning washroom, etc. The list is long if it’s under construction property. Do extra switches and socket fittings throughout the house. A few extra switches and sockets will not cost more during this phase and it will help you throughout your lifetime. Put some extra switches and sockets in each balcony which will come in handy during Diwali decoration or any event.
Car parking – Last but not least in this guide is the selection of parking areas. Generally, society has first cum first serve approach for parking area allotment & that is based on flat booking. i.e. who booked first will get the first choice to pick the parking area.
Do a proper survey of all parking spots available and prepare a list of car parking like 1st choice – parking no 4, 2nd choice – parking number 67 and 3rd choice – parking no 58 and so on based on below conditions.
1) Dimension – Most parking areas are not the same in size, a few are bigger, a few are wider, etc. The rule of thumb is bigger is better here.
2) Open area – Check for open area in parking. These will be the lead source for water during rain, sunlight, and dust. If it satisfies the first condition and If it is a small open area then you can consider it otherwise stay away.
3) Accessibility – Check the location of the parking. Avoid corner parking or near-lift parking. STAY AWAY from parking near the play area as a lot of car scratching happens there by small kids which is unavoidable.
Once you prepare the list based on the above points, then try to park your car and observe it. Sometimes on paper, it gives a good impression but in reality, it’s different. So do a dry run before putting a stamp on it.
Thanks for reading the article and let me know if it helps you. All the best
This is the most important component of a car after the engine and plays a very crucial role in passenger safety. It becomes very important to spend some time inspecting/ cleaning your car brakes once every 6/12 months based on your usage.
You can do a brake service (except brake oil change which includes bleeding) of your car at home and it doesn’t require special tools. So let’s start.
Background – Cars have two types of brakes (disc and drum), both work differently and require different maintenance procedures. Generally, front tires have a disc and rear tires have drum brakes. Front tires handle the tremendous load as the whole engine is situated in front and also while turning the car. So wear and tear is more for the front tires than the rear tires.
Goal – Car brake service majorly involves two works – Brake pad & rotor disc cleaning and greasing the caliper pins. Also brake system requires changing the brake fluid regularly and it’s not similar to engine oil change where you just drain the used oil and fill the new one. As the brake works on a hydraulic principle, there must not be any air trapped inside the brake line. So the procedure is called brake bleeding (Working on the bleeding process is out of scope for this vlog). And bleeding requires expert help so I avoid doing it as a DIY activity.
Procedure – First before jacking the car, let’s loosen all wheel nuts. Trust me your 50% brake job is considered done when you loosen all four tire lug nuts. Again I want to divide the whole work into two steps.
Tire removal (Front & Rear tires)– Before loosening all tire nuts using the tire L spanner (which comes with your car), just tap nicely using a hammer on all lug nuts and then apply the L spanner to open the nuts.
If the tire comes out then well and good otherwise sometimes it gets seized between the tire rim and brake casing. This is quite common because of the constant heat generated by braking and water stuck between the rim and brake casing which create nice conditions for seizing. The tire will come out, just apply a strong kick to the upper side of the tire. It may require a few more kicks that definitely release the stuck tire.
Or you can try hitting the stuck tire with the spare tire on the upper top.
If it does not work then put all nuts back into the tire (just make sure not to tighten the nuts, leave two or three turns so that some space is left). Then drive the car slowly and make a few right/ left turns. This will definitely help the tire to come out. This process remains the same while opening the rear tires.
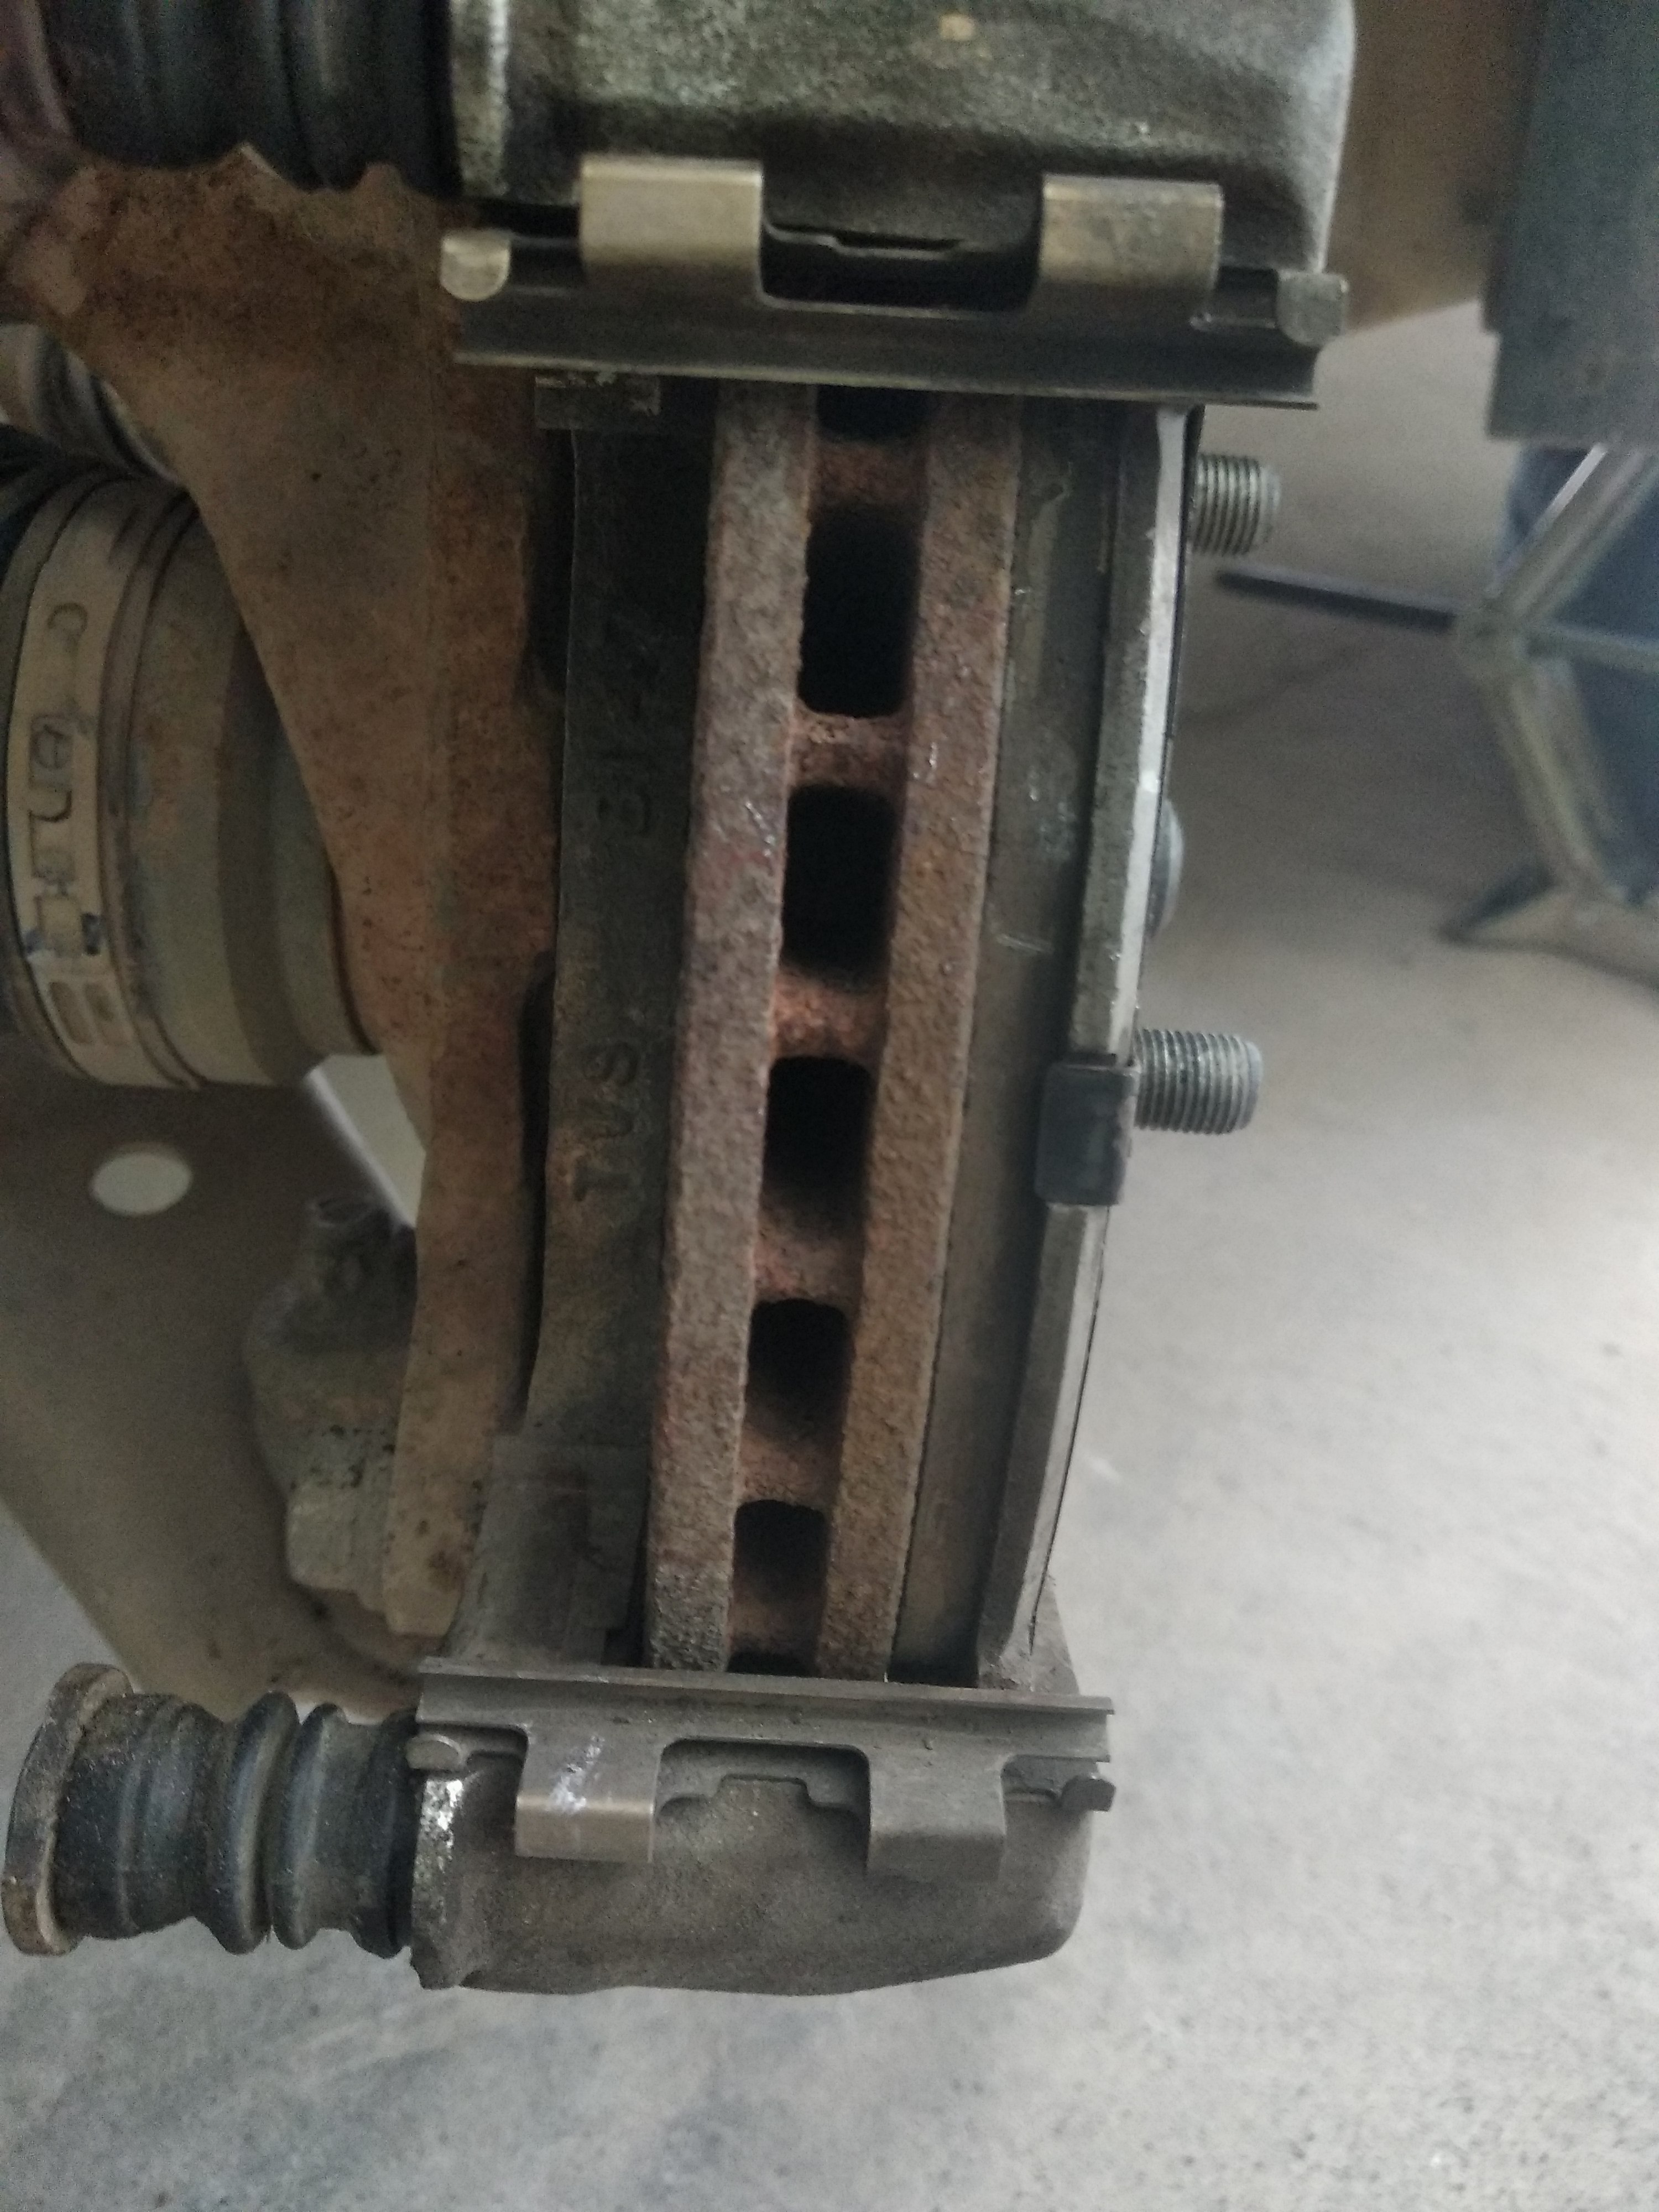
Cleaning and greasing the brake components(Front tires – Disc brakes):- Once you remove the tire from the hub, you will see something like the below image.
Front disc brake
Before starting any work, do a visual inspection for damage, rusting, oil leakages, any missing nuts or brake bleeding caps, etc. So now, we can remove the brake pad after opening the bottom brake caliper pin
Check the brake pad thickness first and decide if it requires a new set of brake pads. There is a simple guide to check the brake condition.
Brake pad condition
Brake pad thickness
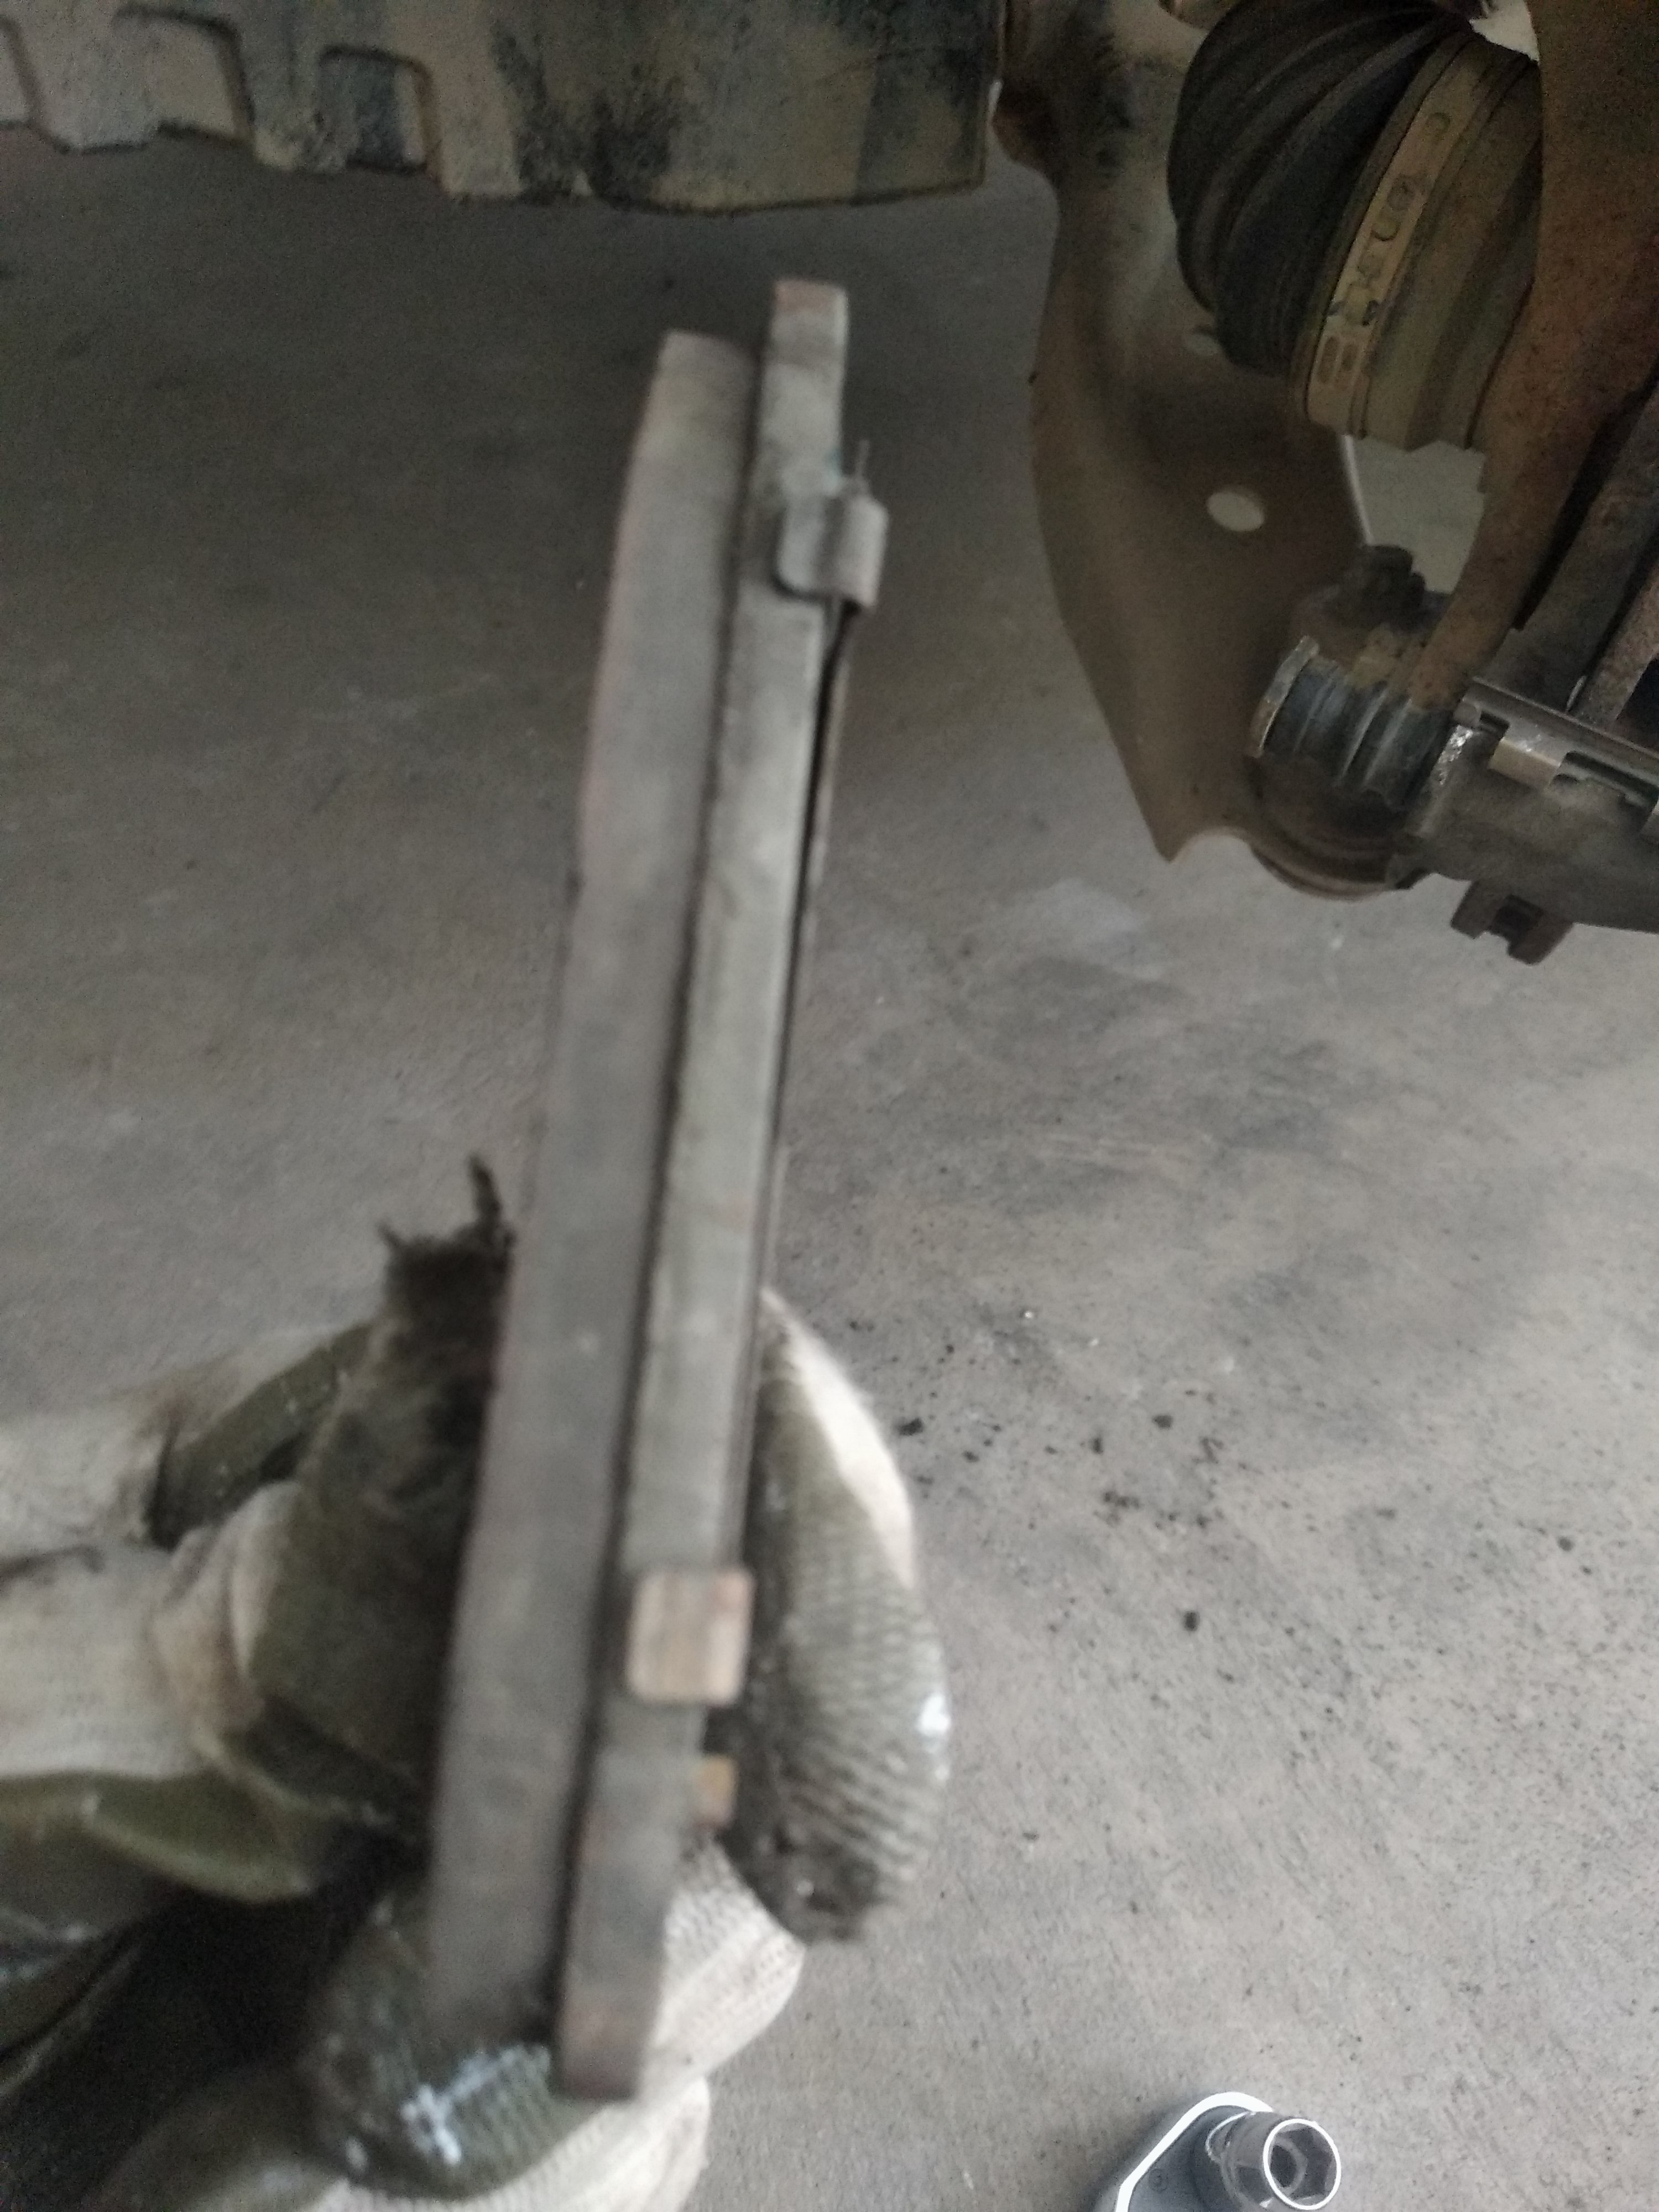
Also, check for any unevenness, and if it passes this condition, then clean the pads properly using the brush, then sand them gently. Once done then spray the pads with any brake part cleaner. Now repeat the same for the rotor disc also.
The last job is to grease the caliper pins using caliper grease and make sure to check the condition of all rubber boots. Change immediately if it’s broken, don’t ignore it. Damaged rubber boots or caps will open a gate for dust entry.
Well done, your brake service is done. Congratulation !!!
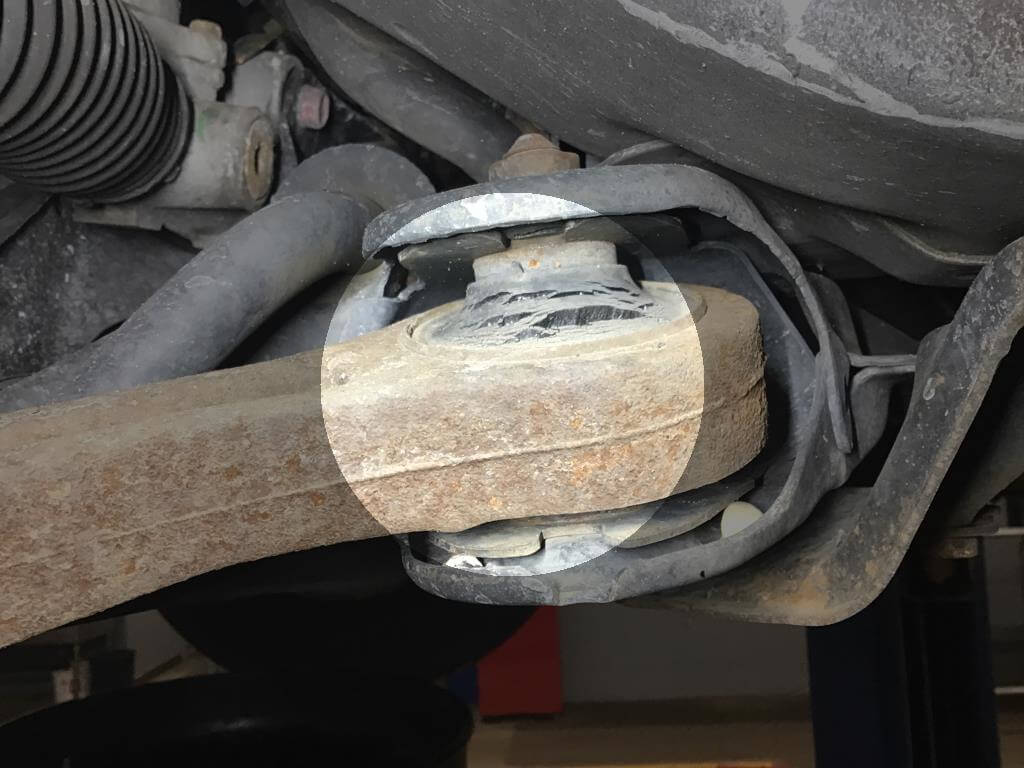
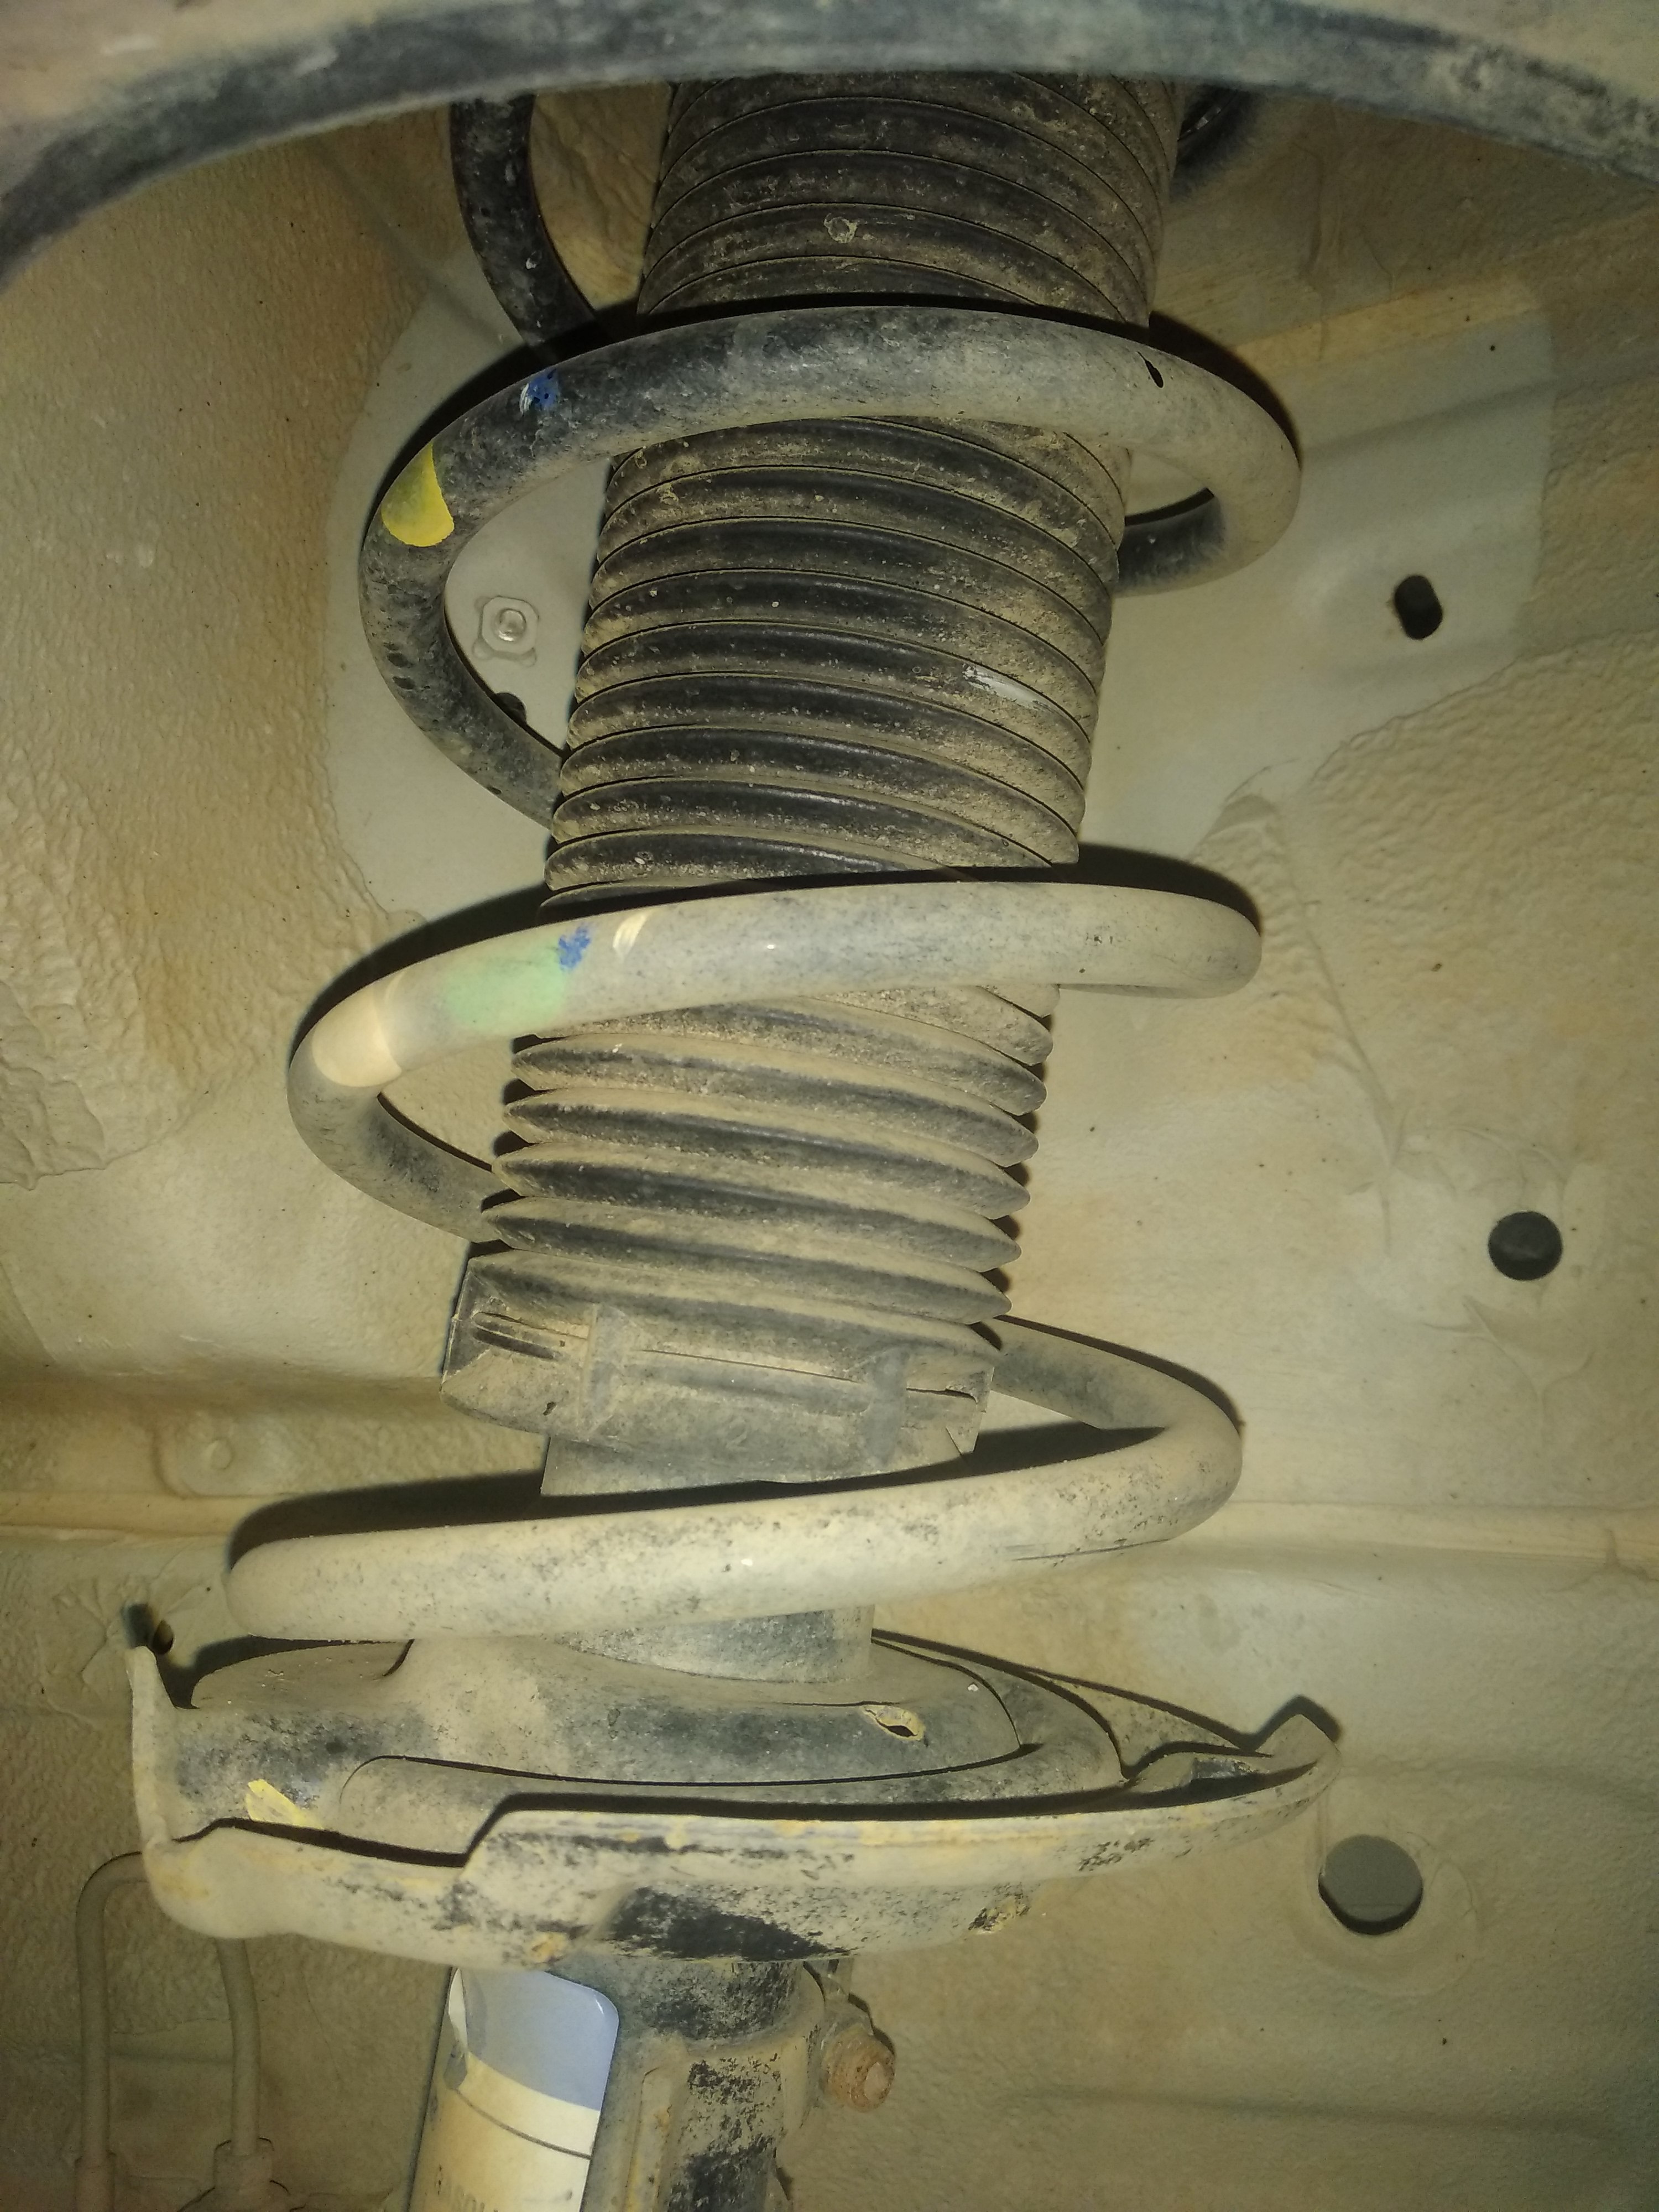
Before installing the tire there, it’s a good idea to check all suspension systems and all bushing.
First, do a visual inspection just for any oil leaks or damage. Second, if it’s muddy and you are not able to see the bushing condition, then clean these using clean water so that cracks and damages will appear clearly.
After cleaning all suspension systems, if you observe any damaged bushes (in ball joints or control arms) then get them replaced by service center guys on your next visit. These damaged bushes create uneven pressure on other major suspension parts and bushes, which leads to major suspension damage.
Shock absorber
Control Arm
Steering control arm bush
Rear shock absorber bush condition
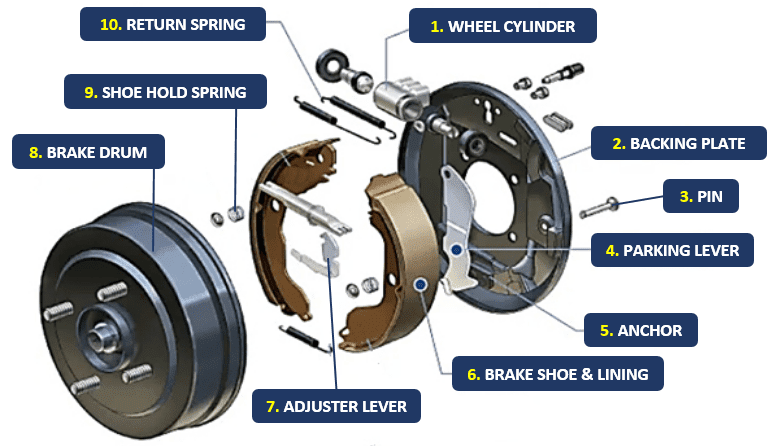
Cleaning and greasing the brake components(Rear tires – Drum brakes):-
After removing the tire, you can see the brake drum. Now challenge is to open this drum so that you can access the drum brake parts which consist of many parts.
But don’t worry, all parts need not be opened for regular service, and in particular, in our case, we just focus on cleaning the parts without opening and checking the brake parts’ condition.
So easiest way to open this drum is to tighten the empty hole with a 10mm bolt and slowly tight it down. Just make sure that you release the parking brake before doing this process.
Now you can see all the drum brake parts, so the first thing is to remove the dust by using a brush and blowing some air/cleaning with a cloth. Once done then it’s time for a close observation of any damage or condition of brake pads etc.
Now do a gentle sanding on the drum casing and on the brake pads and also check the thickness of the brake pads. It’s now time to clean all brake parts using brake cleaning spray.
We don’t have many things to do as a DIY expert. In the case of loose springs which mostly occur due to wear and tear, spring tightening is to be done at a service station. No greasing is required anywhere inside the drum brake. Good, all done.
Once you are back and want to use your car then you should follow the below steps carefully to avoid any major damage to your car. DON’T TRY TO START YOUR CAR without following the below steps.
Visual checks and cleaning – Do a visual check from inside and outside the car and do the cleaning if required. like spider nets, dust, or any oil leakages.
Battery – Check the battery voltage using a multimeter, it should be 12.6 volts, or a little +/- is also OK. If the battery voltage is less then you need to charge your battery. If it’s more than 5 years old then consider replacing it with a new one. DON’T CONNECT THE BATTERY NOW.
Air pressure – Check for any flat tire, if not then maintain air pressure in all tires.
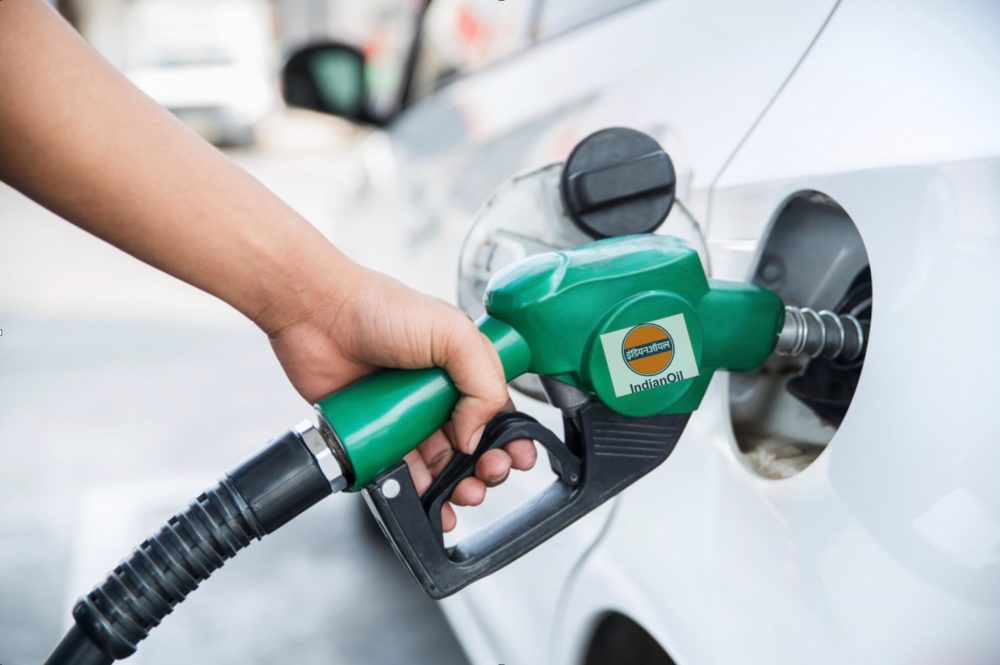
Fuel – Add 4-5 liters of fresh petrol to your petrol tank. It will help to maintain petrol usability. If your storage period is more than 3 months, then I would suggest you pump out (try this pump) the old fuel and do a fresh refilling.
Clean Spark Plug – Follow this step ONLY IF the car storage period is more than 3 months. Open the spark plug and do an inspection. If required, clean it and adjust the gap or replace it.
Engine oil – Check the engine oil level and its quality. It’s the best time to replace the engine oil if it’s due or the car storage period is around a year or more.
Oiling the cylinder – When your car standing for a very long time (more than 3 months), engine oil from the cylinder wall is slowly settled into the oil tray. it’s recommended to pour 1-2 ml of engine oil into every cylinder through a spark park hole as it will help to overcome the low compression issue.
Coolant – Check the coolant level and if required do a top-up.
Once you complete all the above steps then only CONNECT THE BATTERY. Do a very basic power test (Light, horn etc.) and then turn IGNITION ON so that the fuel pump gets into action and the humming sound you hear in the cabin but DON’T TRY TO START NOW. Follow this step 2-3 times so that fresh fuel will come to the fuel line by the fuel pump.
Now it’s time to start the car by turning the key. Most probably, your car will start on the second attempt. All the best and happy driving.
Note – But if it doesn’t start then there are troubleshooting steps there before calling the service center professional for help.
When you are planning to not use your car for a long time (more than a month) then you need to make sure below things to secure your car. It helps you to spend little time turning your car into running condition when you back.
Car Washing – Get your car washed and vacuum the interior properly so that dust, food particles, or any dirt will be removed. The idea, these food particles or dust attract fungus and ants which ultimately leads to rat entry. And once a rat comes inside then it’s the worst thing for your car.
Now it is time for some treatment, where keep a few naphthalene balls inside the cabin in different places like the glove box or inside the driver seat packet. Apply a nice layer of any good-quality rat repellent in the engine bay. Also, apply wax polish on the car paint and apply some tire polish.
Fuel – Never leave your tank empty or have very little fuel. Two things happen when there is little fuel inside the tank.
> First little fuel evaporates quickly and leaves remaining less flammable fuel in the fuel line which creates havoc if someone tries to start the car. If this fuel goes to the fuel line then it chokes or damages the fuel injector etc.
> Second little fuel leaves more area for corrosion or rusting.
So it is always a best practice to keep a sufficient amount of fuel in the tank. If possible park your car in a shady area or under covered parking.
Tire pressure – Fill the tire with the maximum allowed tire pressure (check the manufacturer information). The tire will slowly lose pressure and there’s a very good chance that when you come back, your tire condition will be in good shape.
Battery – Check the battery water level and make sure it’s fully charged. Then Remove the battery terminals and apply grease on terminals and wire ends to prevent rusting. If possible keep the battery in a cool and dry place.
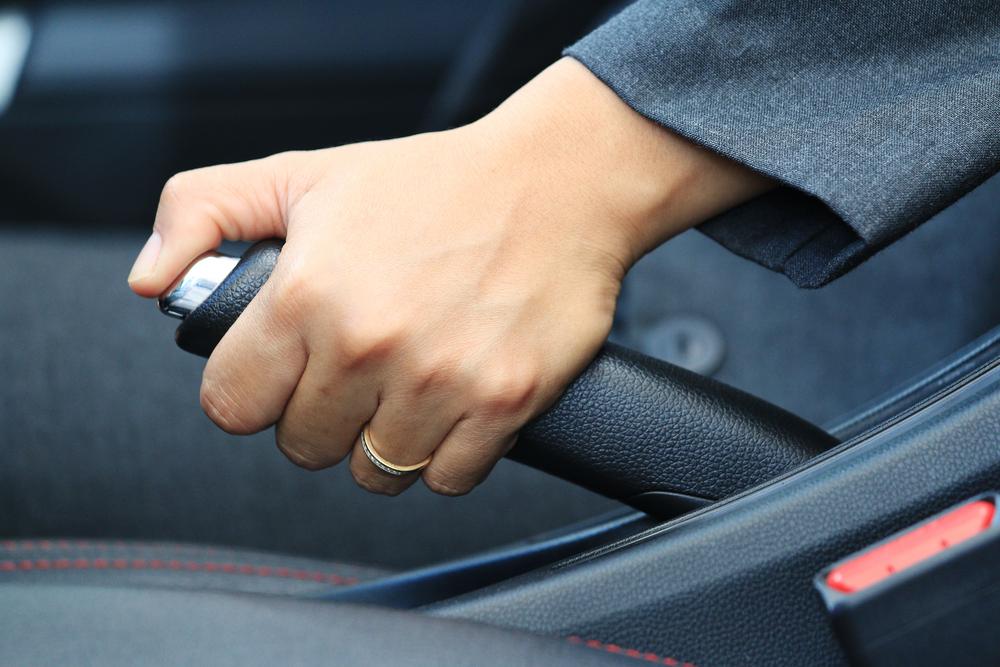
Brakes – Handbrakes are connected to rear tires which have drum brakes mostly. It will cause them to stuck because of constant applied pressure (caused by to handbrake wire) and rusting. So it’s advisable to not apply hand brakes when leaving the car for a long time.
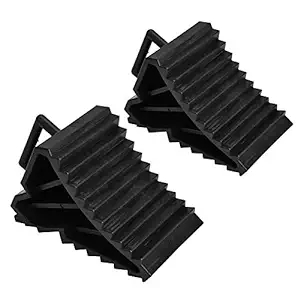
It’s a good idea to apply gear ONLY if the car is on a flat surface otherwise keep the car in neutral gear and use a wheel stopper.
Now your car is ready for long storage. Have a nice day.
There are various ways to program the ESP 12 chip but my favorite is to program using NodeMCU as it requires only a few jumper wires and you are ready to program the chip.
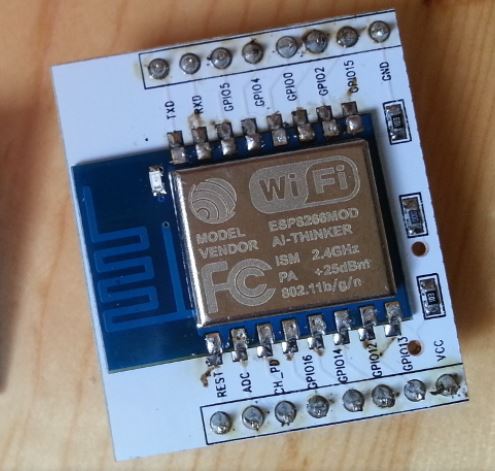
So my suggestion is to solder the ESP 12 chip to breakout board so that you will get breadboard friendly chip which make rest of the process easy.
Its little challenging but great fun to solder the chip into the breakout board. Once you solder, you will get something like this
We are just few pins away from programming this tiny chip, so that you can minimize the whole circuit.
Now according to below diagram, just connect the wire and you are ready to program it.
No need to worry about 10K registers shown in above diagram, these registers are already included in breakout board as per datasheet. So just connect GPIO 0 (D3), Rx, Tx and reset pins from NodeMCU and ESP12 chip. And yes, you can power the breakout using NodeMCU VCC(3.3v) and GND or you can use a separate power supply to power the breakout board but just make sure it only require 3.3v (Dont power it with 5v adapter as its not having any step down power regulator).
Select the same Board: NodeMCU 1.0 (ESP 12E Module) and Port Number.
Actually, in my apartment, we have two big-size Diesel Generators (DG) that are capable of providing the power supply to all flats in the society. But there is no auto switching of these DG in case of a power cut so basically there is a delay of 5-10 minutes before the DG starts and takes care of power requirements.
My case is quite unique in nature where I want UPS for my wifi router only for a very short period (5-10 minutes).
There are quite a few options that I can use in order to design my own DIY mini UPS. Using relays or MOSFET but in all designs there is a change over time (when actual switching happens between adaptor power supply and battery power supply). Technically there is no power supply for a minimum of 1 or 2 seconds during this change over time.
I am having a 12v (9 Ah) VRLA zero maintenance battery from my RE Bullet. And its 5 years old and unable to provide sufficient power for cranking the bullet starter motor.
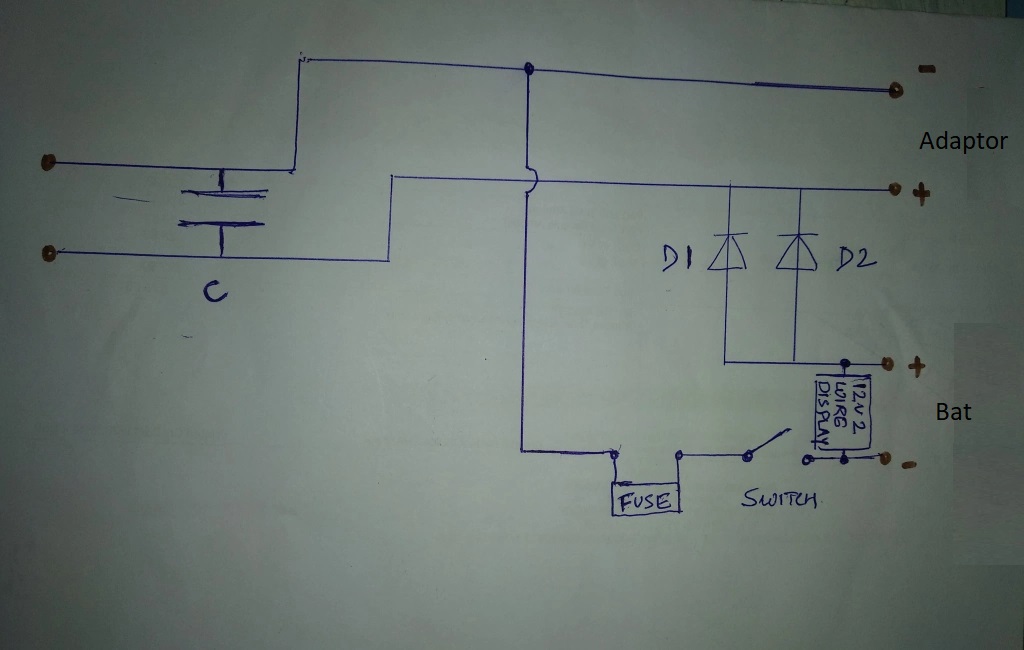
So decided to design a very simple circuit (Don’t want to use Relay or MOSFET) using a few diodes and a capacitor and work on the simple principle of current flows. Let’s take an example, suppose we have two power supplies, the first is a 12v power adaptor (called S1) and the second is a battery of 11.5 volts (called S2). Both are connected to a common load (12-volt wifi router). So current takes the path from power adaptor of 12v to common load and ignoring the battery power but scenario change when power goes off. Now, current start from available source i.e. battery power.
When power restored then current take the path from higher voltage to common load which is now a power adaptor source (12v) and ignoring the battery power (11.5v).
In this whole process, there is a change over time of 1-2 seconds which is effectively handled by the capacitor of 4400uf. It provides the required power supply during this short period of time. Diodes are used to reduce the battery voltage from 12v to 11.5v and also it’s disconnects the power adaptor from charging the battery. As per my calculations, there is very minimal power consumption from wifi router for this short period of time and power cuts are also very minimal so charging is not required as of now.
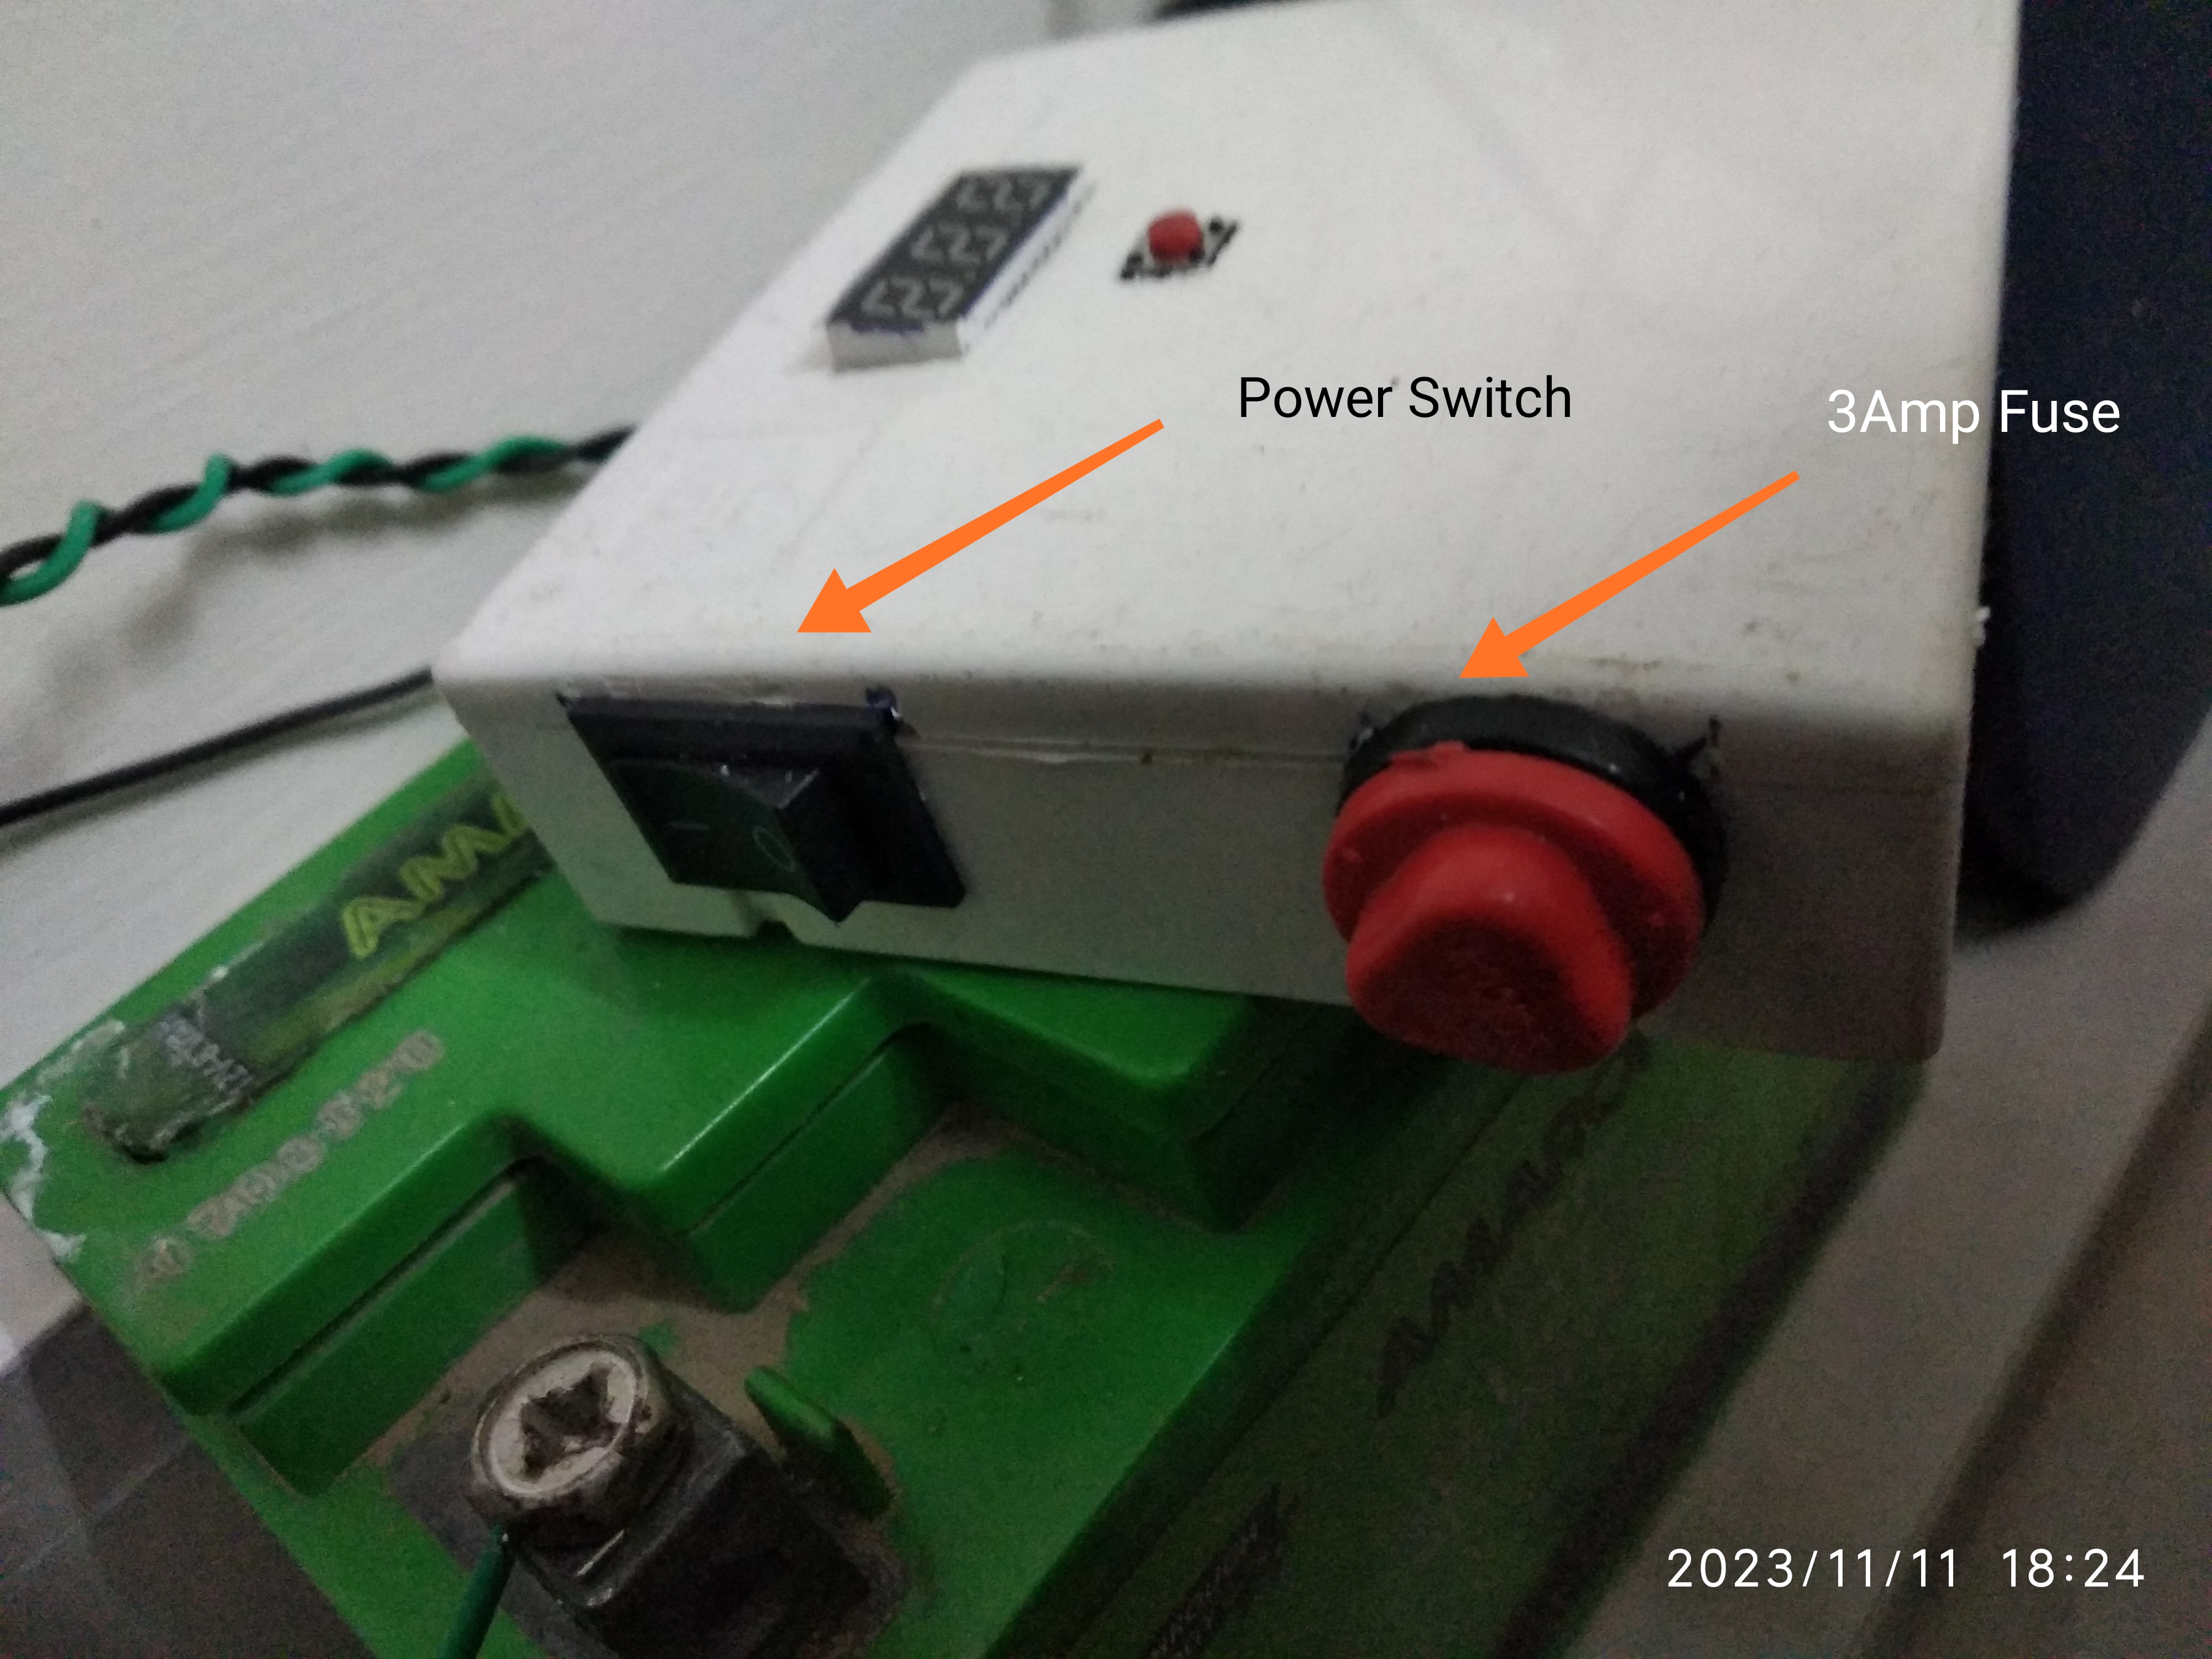
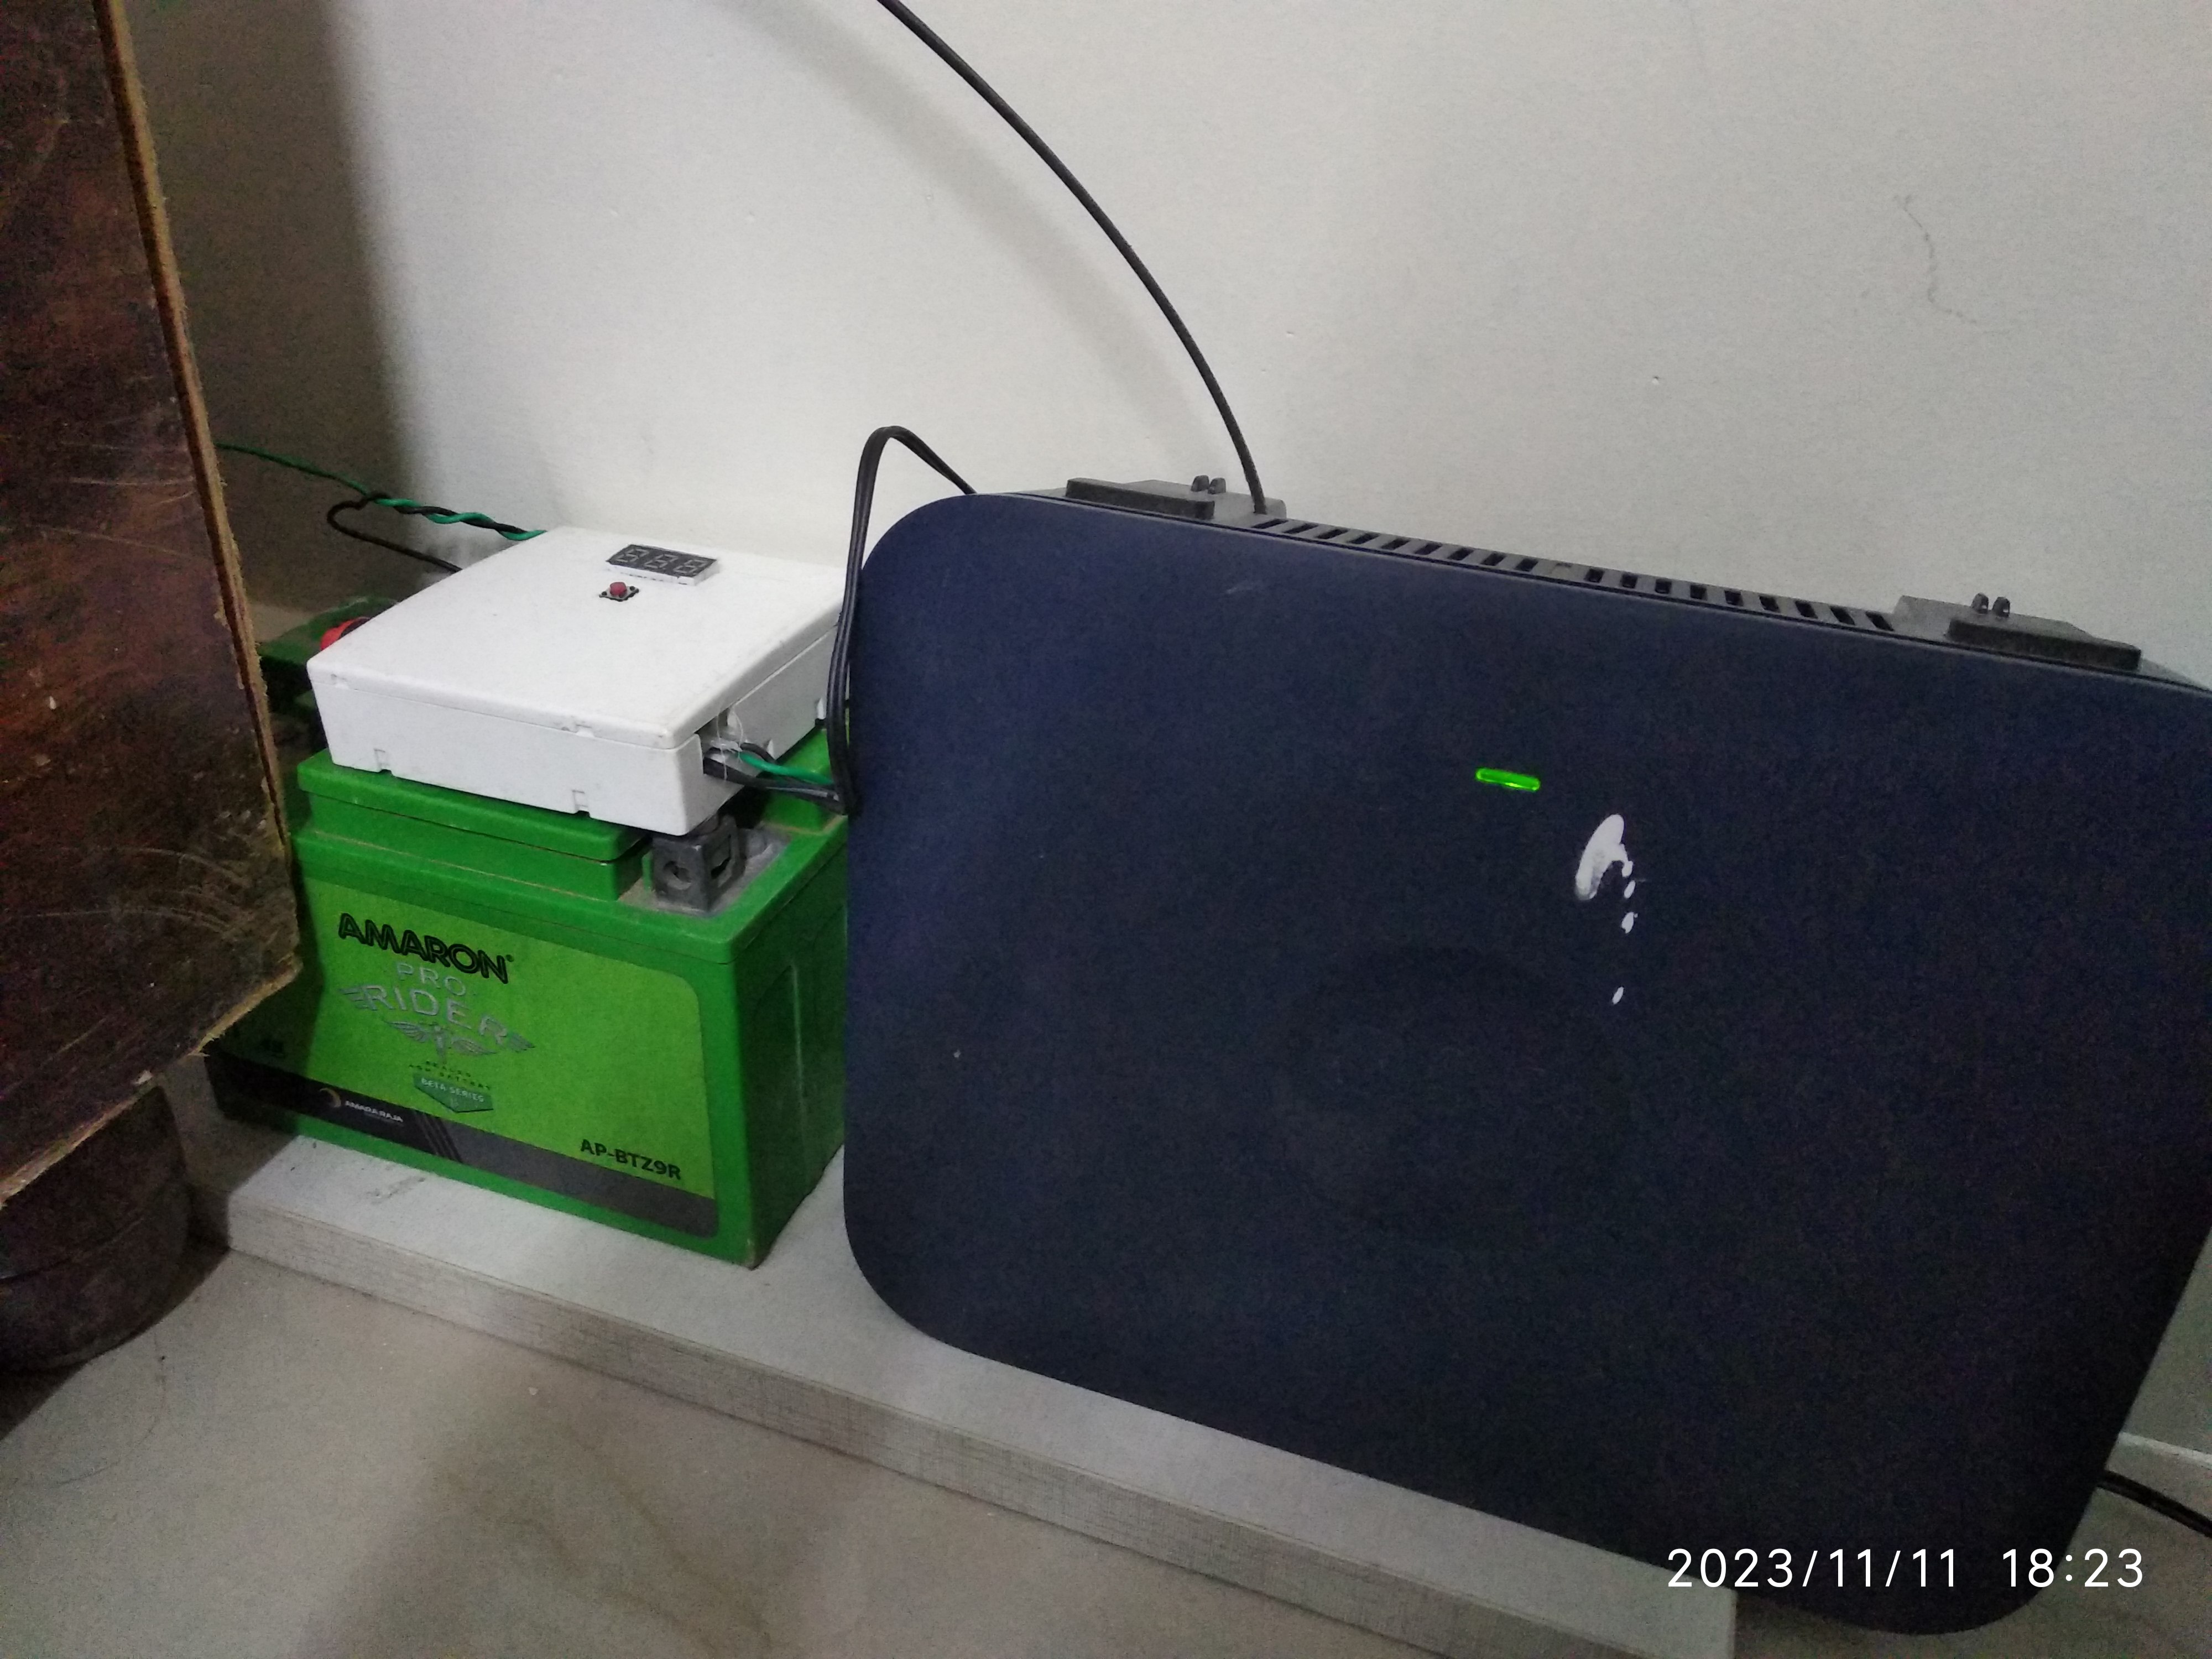
Included a battery voltage measurement module which shows the available battery voltage and also installed a 3 Amp fuse for extra safety.
Tested the whole circuit for almost a month where it’s performed exceptionally well with zero failure.
Old setup for almost a month
So finally converted the whole circuit in PCB and installed it into a compact box.
if you work with 3.3v TTL MCU, then you definitely come across scenarios where designing some low-power ESP8266 setup to run a motor with a single battery (voltage of 3.7 to 4.2 v). Relay coil may work with 4.2V but to be very sure you have to keep a steady voltage source for 5V. This is an overhead with the relay in a low-power circuit.
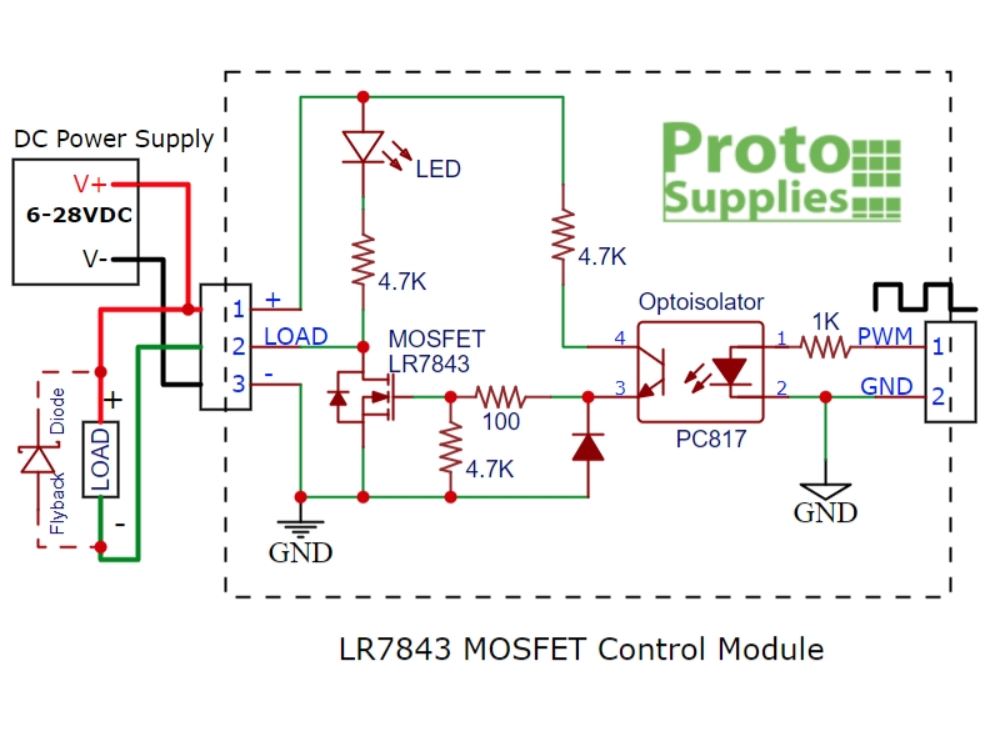
MOSFET comes as a lifesaver, you can control the motor using MOSFET by a control voltage of 2.5V – 20V. So basically this can easily be controlled using ESP8266. It’s a big relief for me as I am trying to design a low-powered device to control the water pump for my gardening system.
I successfully used LR7843 MOSFET module with ESP8266 to control the water pump. below are a few screenshots that will help you wire the circuit.
Don’t forget to use the flyback diode between loads if you are using a motor as a load which I missed during my test.